 Copy Material Command
- General Overview
- Step-By-Step
- Tips and Tricks
- Related Tools
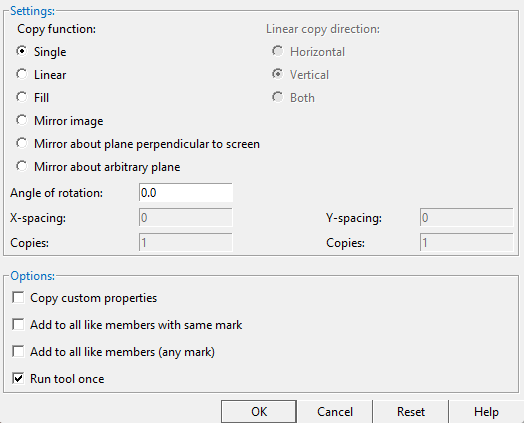
Copy function: 'Single' or 'Linear' or 'Fill' or 'Mirror image' or 'Mirror about plane perpendicular to screen' or 'Mirror about arbitrary plane'
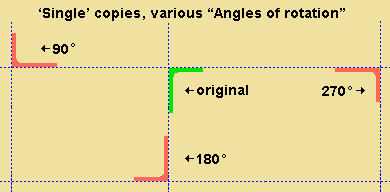
'Single' generates a single copy of the selected materials, bolts or welds with the option to set an "Angle of rotation".
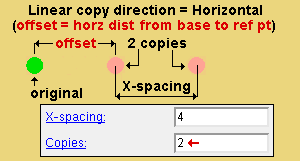
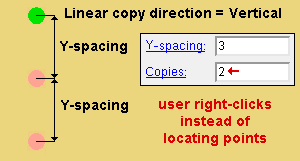
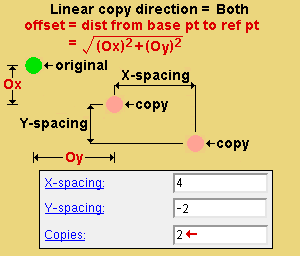
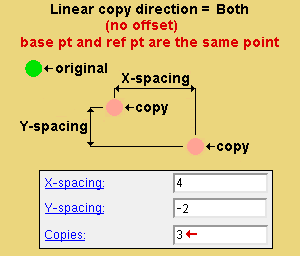
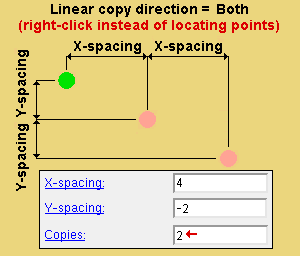
' Linear ' generates multiple " Copies " of the selected materials, bolts or welds in the " Linear copy direction " that you specify.
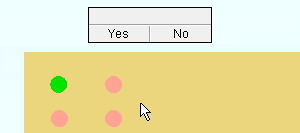
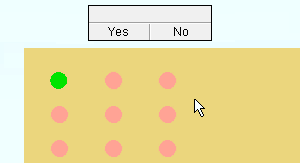
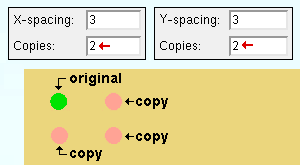
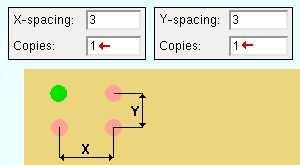
' Fill ' generates multiple copies of the selected materials to fill the " X-spacing ," X number of " Copies " and " Y-spacing " and Y number of " Copies ."
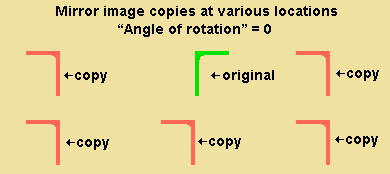
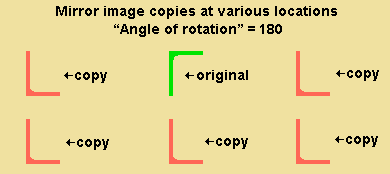
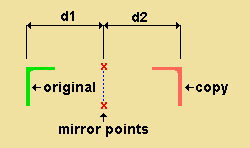
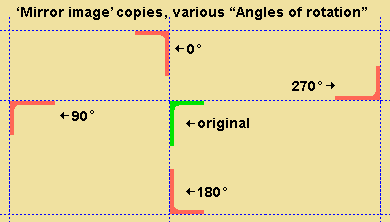
' Mirror image ' creates a material, bolt or weld that is a mirror image of each originally selected material, bolt or weld. When the " Angle of rotation " is ' 0 ', the copy is mirrored across a vertical plane that is perpendicular to the work plane of your view. The operation works just like a ' Single ' copy, except that each selected material, bolt or weld is mirrored.
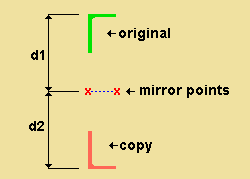
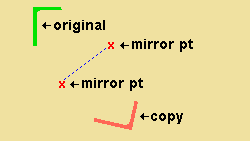
' Mirror about plane perpendicular to screen ' creates a material, bolt or weld that is mirrored across any horizontal, vertical or diagonal plane that is perpendicular to the work plane of your view. The operation is similar to a ' Single ' copy, except that instead of locating a base point and a copy reference point, you locate two points to establish a mirror that is half way between the original material and the location where you want the mirrored copy to be placed.
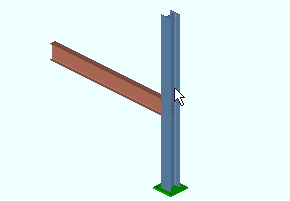
' Mirror about arbitrary plane ' is similar to ' Mirror about plane perpendicular to screen ', but can be done in an isometric view .
Linear copy direction: Horizontal or Vertical or Both . This applies when ' Linear ' is the " Copy function ." The specified direction is with respect to screen axes .
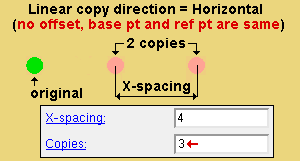
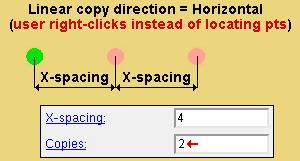
' Horizontal ' copies horizontally based on the choices made to " X-spacing " and " Copies ."
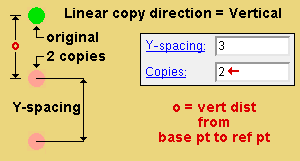
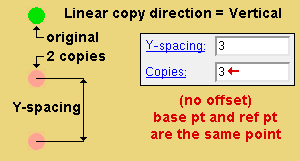
' Vertical ' copies vertically based on the choices made to " Y-spacing " and " Copies ."
' Both ' copies diagonally based on the choices made to " X-spacing ," " Y-spacing " and " Copies ."
Angle of rotation: Any positive or negative (-) angle from 360 to -360 degrees. This applies when ' Single ' or ' Mirror image ' is the " Copy function ."
' 0 ' does not rotate the copied materials.
A ' positive number ' rotates the copied materials counterclockwise.
A ' negative number ' rotates the copied materials clockwise.
X-spacing: A positive or negative (-) distance that defines the spacing along the X screen axis . This applies only when ' Fill ' is the " Copy function " or ' Both ' or ' Horizontal ' are the " Linear copy direction .
A ' positive distance ' adds copies to the right of the base point.
A ' negative (-) distance ' adds copies to the left of the base point.
Copies: The number of copies ( 1 or 2 or ...) or the number of spaces ( 1 or 2 or ...) that you want in the horizontal ( " X-Spacing ") direction. Copy Material will not copy over the original material that is being copied, which may result in one fewer copy than you might expect.
Y-spacing: A positive or negative (-) distance that defines the spacing along the Y screen axis . This applies only when ' Fill ' is the " Copy function " or ' Both ' or ' Vertical ' is the " Linear copy direction ."
A ' positive distance ' adds copies above the base point.
A ' negative (-) distance ' adds copies below the base point.
Copies: The number of copies ( 1 or 2 or ...) or the number of spaces ( 1 or 2 or ...) that you want to be made in the horizontal (" Y-spacing ") direction or in the diagonal direction (" X-spacing " + " Y-spacing ").
If this box is checked (
), the custom properties that have been applied to materials that you are copying will be copied to each copy of those materials. This can be verified by doing a multi-edit of all of the materials and confirming that there are no mixed entries on the Edit Properties window that opens.
If the box is not checked (
), the new materials that are created by this Copy operation will use the default custom properties.
Add to all like members with same mark: ![]() or
or ![]() . This might be used, for example, if you are copying a material on one member and want the copied material to be added to other members with the same member piecemark .
. This might be used, for example, if you are copying a material on one member and want the copied material to be added to other members with the same member piecemark .
If this box is checked (
), the material you copy to the one member will be copied to all members with the same member piecemark as the member you copied to.
If the box is not checked (
), the material you copy to the one member will be copied to that member only.
Add to all like members (any mark): ![]() or
or ![]() .
.
If this box is checked (
), this accomplishes the same results as "
Add to all members with the same mark " but may also add the material to members that are the same except for their member piecemarks . For example, members that are otherwise identical may have different marks if one or more of those members have been assigned a " User piecemark ."
If the box is not checked (
), the copied material will not be added to any additional members.
If this box is checked (
), the command ends after confirming the copied material on the selected member.
If the box is not checked (
), the command repeats the option to add more copies of the material to the selected member, and provides the option to select a different member to copy the same material to.
"OK" (or the Enter key) closes the window and applies the settings on it to the to-be-performed copy operation.
"Cancel" (or the Esc key or the
button) closes this window and ends the Copy Material operation.
"Reset" undoes all changes made to this window since you first opened it. The window remains open.
1 . Preselect one or more materials to enable the Materials contextual page. At this point you have the option to select additional materials, bolts, or welds for copying. Click the Copy Material icon found in the Modify section. Skip step 2.
Alternative : Invoke Copy Material using the Find Tool by searching the command name and clicking the Copy Material icon, which is pictured above. Proceed to step 2.
Learn more about alternative methods for launching commands.
2 . Select one or more materials, bolts, or welds.
Method 1 : Right-click and select "OK" from the shortcut menu.
Method 2 : Press the Enter key.
Alternative : You can press the Esc key or right-click and choose "Cancel" on the shortcut menu to end the command.
3 . The Copy Material window opens. The name of this window tells you how many materials you selected and the number of members those materials were selected from. For example, the window's title might be "Copy 1 materials on 1 members."
3a: Choose the settings that you want, then press the " OK " button to continue.

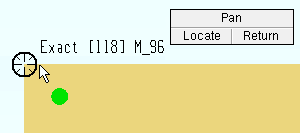
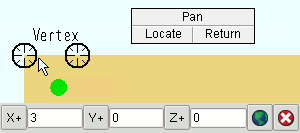
4 . The status line prompts, " Locate base point. " Locate- Pan -Return mouse bindings become active along with various Locate options. The choices you have in this step depend on the settings you selected in step 3a.
|
|
|
bindings |
Alternative 1 (for a ' Single ' or ' Linear ' or ' Fill ' copy) : Select the appropriate Locate icon (if it's not selected already). Place the mouse pointer (
) so the point location target (
) snaps to where you want the base point, then left-click ( Locate ). The materials will be copied relative to the base point later on in the command (step 6).
Alternative 2 (for a ' Single ' copy) : Right-click ( Return ) to cancel the Copy Material command and keep everything as it was before step 1. Do not continue.
Alternative 3 (for a ' Linear ' of ' Fill ' copy) : Right-click ( Return ) to cause the " X-spacing " and " Y-spacing " to be copied the designated number of times. Also, the member that is associated with the material being copied will automatically be selected as the member that the copied materials will attach to.
Skip steps 5 and 6. Go to step 7.
5 . The status line prompts, "Locate member to copy to." Select - Pan - Menu mouse bindings become active. Note that this step is skipped for a linear fill operation if you right-clicked ( Return ) in step 4.
|
|
|
bindings |
Alternative 1 : Place the mouse pointer (
) on the one (1) member you want the material copied to, then left-click ( Select ).
Alternative 2 : Right-click ( Menu ) and choose " OK " or press the Enter key to copy the material to the same member(s) they were copied from.
Alternative 3 : Right-click ( Menu ) and choose " Cancel " or press the Escape key to end the command without copying material.
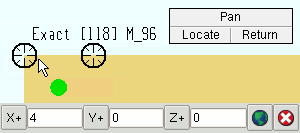
6 . The status line prompts, "Locate copy 1 reference point." Locate- Pan -Return mouse bindings become active along with various Locate options. A preview of the copied material is shown with the point location target ( ![]() ) located at the base point you selected in step 4. Note that this step is skipped for a linear of fill operation if you right-clicked ( Return ) in step 4.
) located at the base point you selected in step 4. Note that this step is skipped for a linear of fill operation if you right-clicked ( Return ) in step 4.
|
|
|
bindings |
Alternative 1 : Select the appropriate Locate icon. Place the mouse pointer (
) so the point location target (
) snaps to the location you want material copied to (relative to the base point you selected in step 4), then left-click ( Locate ). The status line then prompts "Locate copy 2 reference point" so you can continue adding copies of the material to the selected member(s). This process continues until you right-click ( Return ).
Alternative 2 : If "Run tool once" is checked (
) in the Copy Material window, right-click ( Return ) to end the command.
Alternative 3 : If "Run tool once" is not checked (
), right-click ( Return ) to repeat step 5 (select a member to copy to).
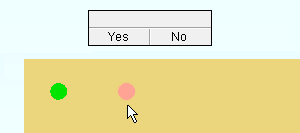
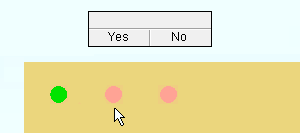
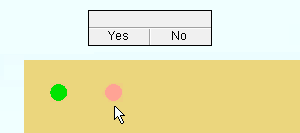
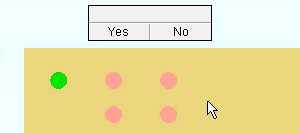
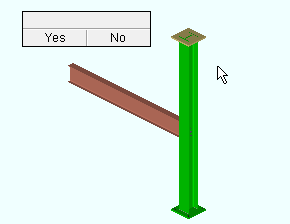
7 . The status line prompts, "Confirm (x) copies on (x) members", where (x) is the number of material copies and the number of members the material was copied to. Your computer screen redraws to show the placement of the copied material. Yes - No mouse bindings become active.
|
|
|
bindings |
Alternative 1 : Left-click ( Yes ) to accept the copy. If "Run tool once" is checked (
), the command ends.
Alternative 2 : Left-click ( Yes ) to accept the copy. If "Run tool once" is not checked (
), the command repeats step 6 (where you also have the option to repeat step 5 and select a new member to copy material to).
Alternative 3 : Right-click ( No ). If "Run tool once" is checked (
), the command ends.
Alternative 4 : Right-click ( No ). If "Run tool once" is not checked (
), the command repeats step 6.
- Screen coordinates ( Copy Material functions with respect to)
- Offset Controls (alternative method for offsetting copies of material)
- Bolts (may be copied along with material)
- Welds (may be copied along with material)
- User and Site Options > General > Point selection by area box (affects Copy Material )
- Add Assembly (another way to copy material, bolts and welds)
- Existing material (to add copies of material)
- User and Site Options > Site > Custom property items to copy > Material
